- Introduction
vim plugin那麼多,如果可以用一套軟體來管理的話,似乎會更有效率一點,
Vundle可以對vim的plugin:
- 對.vimrc裏面的plugin持續追蹤和管理
- 安裝plugins
- 更新所有的plugins
- 可搜尋所有可取得的plugin
- 清除沒在用的plugin
- 可以用一個簡單的指令完成以上所有動作
- 安裝完後自動生成help tags
- 自動管理安裝腳本的路徑
~~~~~~~~~~~~~~~以下正文~~~~~~~~~~~~
記得安裝git 和 curl:
- sudo apt-get install git-core curl
使用git下載vundle:
- git clone https://github.com/VundleVim/Vundle.vim.git ~/.vim/bundle/Vundle.vim
- vim ~/.vimrc
然後將底下的部份加入到.vimrc
- set nocompatible " be iMproved, required
- filetype off " required
- " set the runtime path to include Vundle and initialize
- set rtp+=~/.vim/bundle/Vundle.vim
- call vundle#begin()
- " alternatively, pass a path where Vundle should install plugins
- "call vundle#begin('~/some/path/here')
- " let Vundle manage Vundle, required
- Plugin 'VundleVim/Vundle.vim'
- "這邊加入你要加入的Plugin
- " All of your Plugins must be added before the following line
- call vundle#end() " required
- filetype plugin indent on " required
- " To ignore plugin indent changes, instead use:
- "filetype plugin on"
- " Brief help
- " :PluginList - lists configured plugins
- " :PluginInstall - installs plugins; append `!` to update or just :PluginUpdate
- " :PluginSearch foo - searches for foo; append `!` to refresh local cache
- " :PluginClean - confirms removal of unused plugins; append `!` to auto-approve removal
- "
- " see :h vundle for more details or wiki for FAQ
- " Put your non-Plugin stuff after this line
上面可以看到主要套件就是加入到,
call vundle#begin('~/some/path/here')
......
call vundle#end() " required
這兩個區段中間,
除了Vundle.vim一定要安裝以外,
其他的你要安裝的就請加入到這個區段中間。
在vim的command mode底下輸入:
- :PluginInstall
又或者是在一般的cmd底下輸入:
- vim +PluginInstall +qall
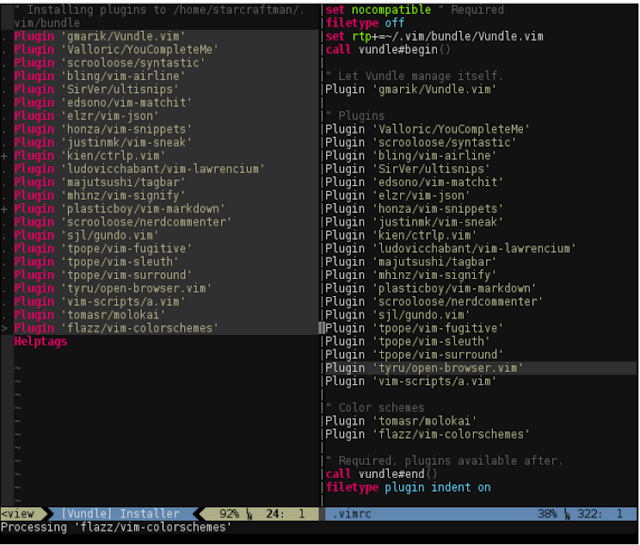
他就會開始安裝了,安裝畫面如下:

像是剛剛組態設定那邊有說,他除了PluginInstall可以安裝套件以外,
他還有其他的3個功能:
- :PluginList - lists configured plugins
- :PluginSearch foo - searches for foo; append `!` to refresh local cache
- :PluginClean - confirms removal of unused plugins; append `!` to auto-approve removal
其他更細節的部份請參考
- :h vundle
No comments:
Post a Comment